ModelJudge Exercise Editor Tutorial
Table of Contents
- 1. Requirements
- 2. Creating a New Exercise
- 3. Entering the exercise editor
- 4. Generating an Initial Annotation
- 5. The ModelJudge Annotations
- 6. Adding new Annotation Fragments and Relations
- 7. Removing Annotation Fragments and Relations
- 8. Saving, Uploading and Downloading
- 9. An Iterative Design Methodology
- 10. Filtering
- 11. Recap
The new version of ModelJudge comes with a built-in online exercise editor. This allows the creation of new exercises to make personalized courses for your class. In this tutorial, we will see how to create a new exercise along with a personalized course in the ModelJudge platform.
This tutorial assumes you have an instructor account. If you are an instructor but don't have an instructor account, please contact us at modeljudge@cs.upc.edu.
1 Requirements
In order to create a new exercise, you will need a textual description of the
process model that students need to model. A reference BPMN model is not necessary,
as ModelJudge will work from the textual description only. The description must
be stored in a plain text file (.txt) and should consist of a series of
paragraphs, with the following restrictions:
- Similar to the LaTeX document typsetting language, a paragraph is defined with two consecutive newlines.
- The newline characters should use the UNIX format (
\n), not the Windows format (\r\n). - The encoding of the file should either be ASCII or UTF-8. Please avoid using ISO-8859-1.
- Apart from the newline separator, no other newline character should be present in the document.
If you don't have a description readily available, you can use the one provided here for reference: Zoo.txt
2 Creating a New Exercise
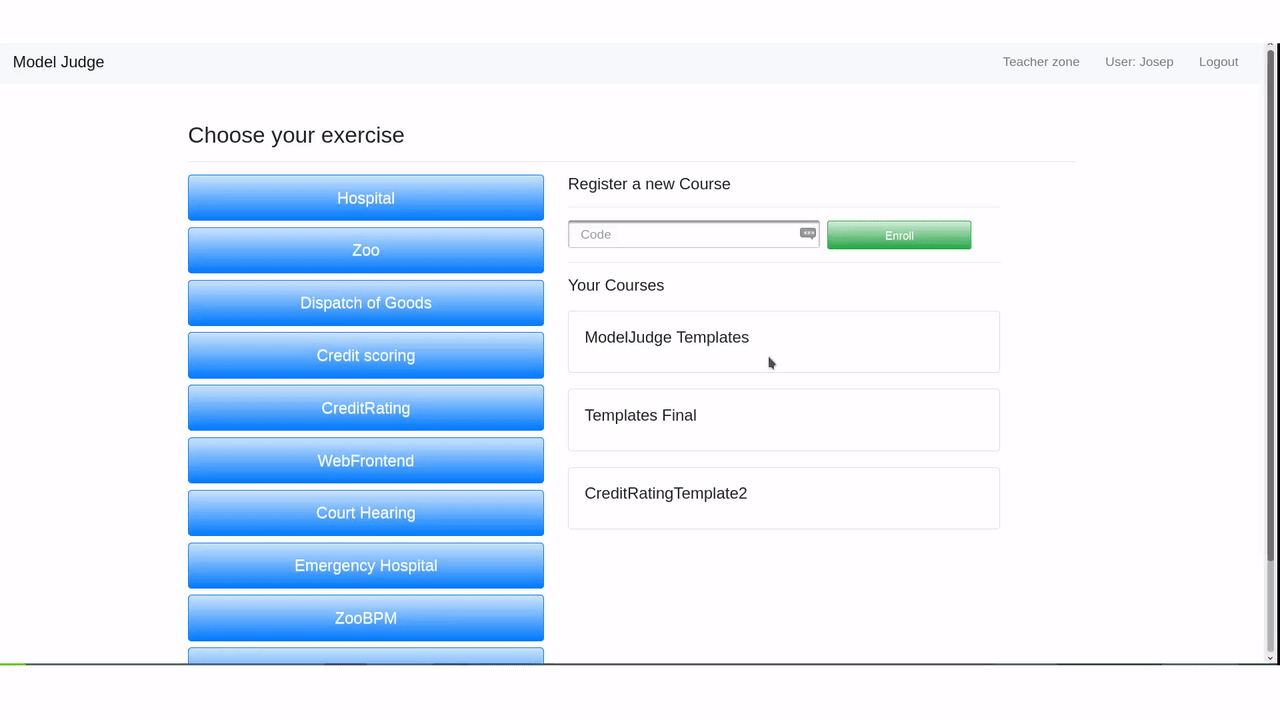
After logging into the ModelJudge platform, you will land in the main page, where you can choose an exercise to complete. Instead of doing that, we will go to the user zone, by clicking on "Teacher Zone" at the top-right corner of the page
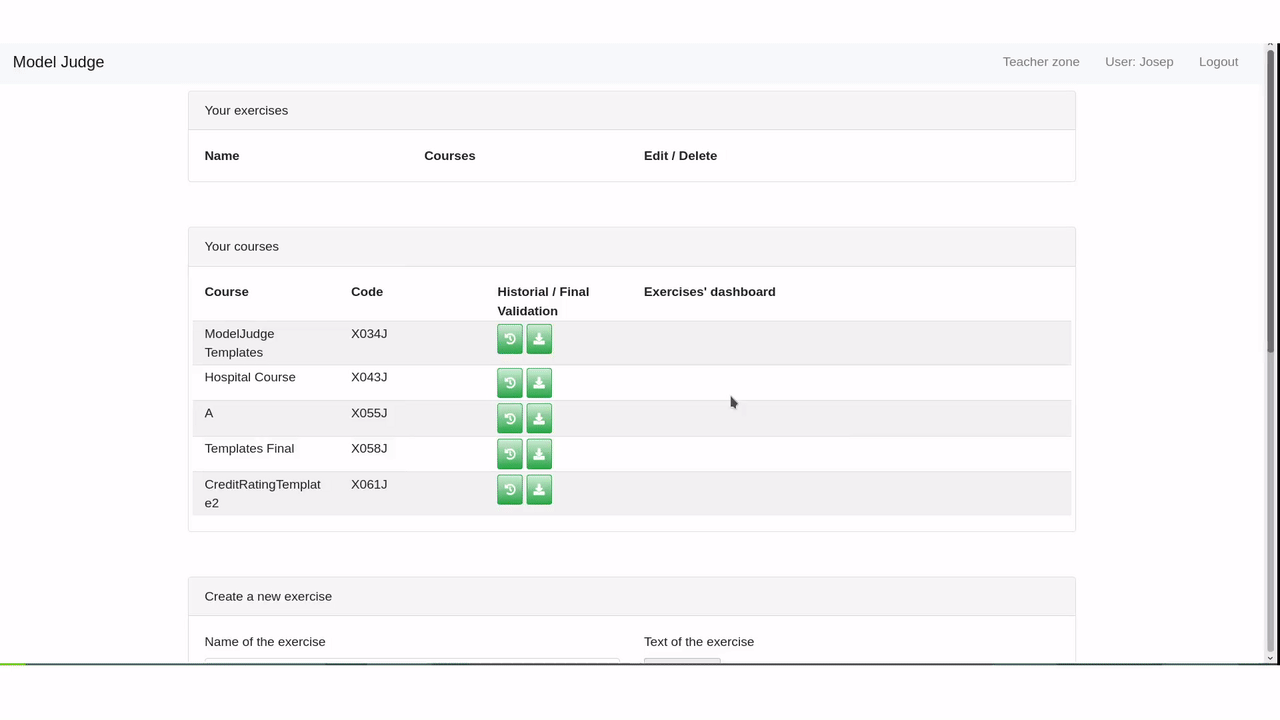
Next, scroll down to the bottom of the page, to the "Create a new exercise" form. Give it a name, and upload your text file.
In the next sections, we will explore how to annotate the textual description you just uploaded.
3 Entering the exercise editor
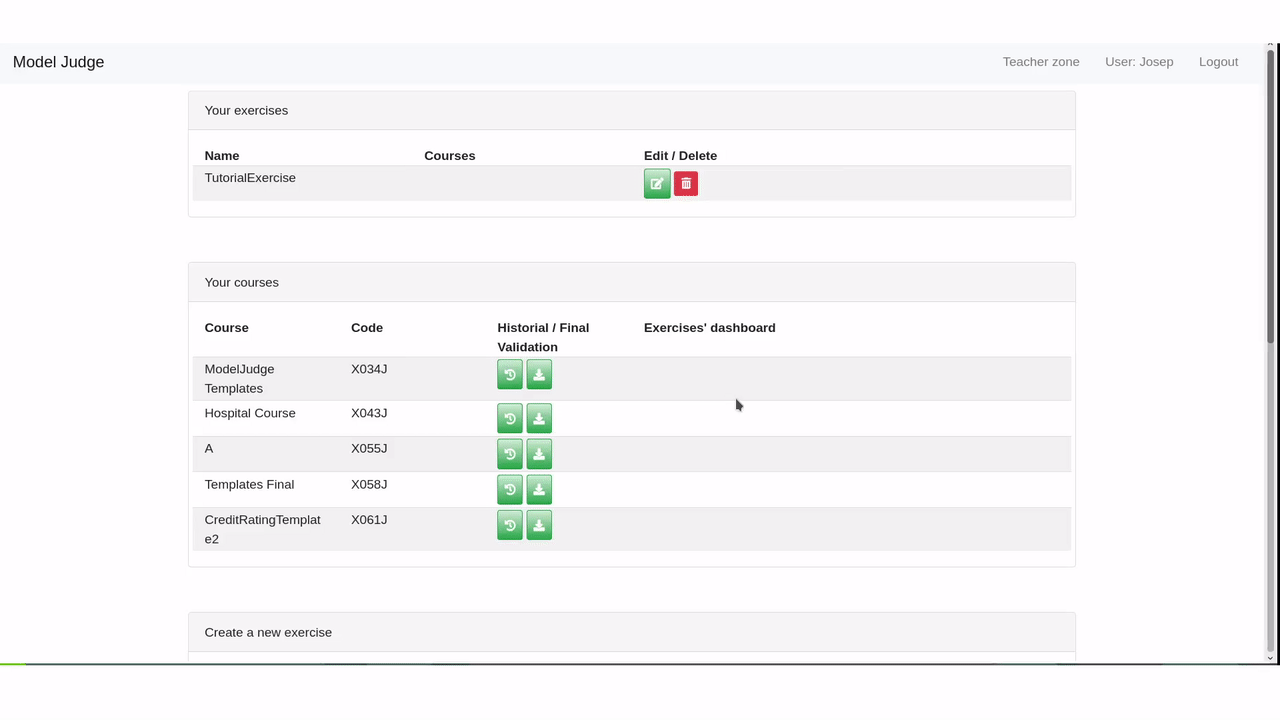
To enter the exercise editor, click on the editor button (the righsmost one) in the course panel for your desired exercise. You will be presented with the exercise editor interface.
4 Generating an Initial Annotation
The editor interface allows you to annotate your text. Annotations are used by ModelJudge to better understand the solution of a problem. There are two approaches when creating an exercise annotation:
- Starting from a blank annotation, and add all the elements manually.
- Start from an auto-inferred initial annotation and refine it by adding or removing information.
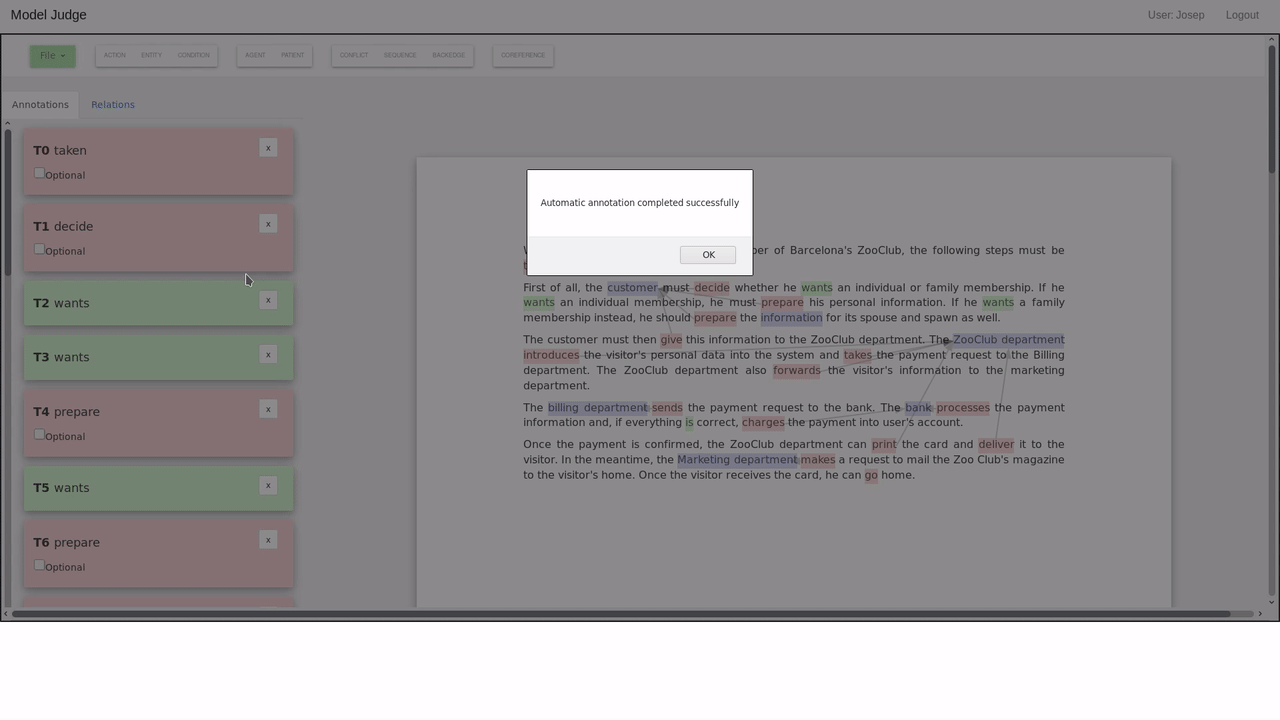
In this tutorial, we will follow the second approach, and allow ModelJudge to generate an initial annotation for us. Typically this saves the instructor from tedious work that would otherwise need to be performed manually.
After some time, the annotation will be completed and you will be shown a message. Please bear in mind that this functionality is still in beta and there is no progress indicator. Be patient, the process may take up to a couple of minutes to complete.
5 The ModelJudge Annotations
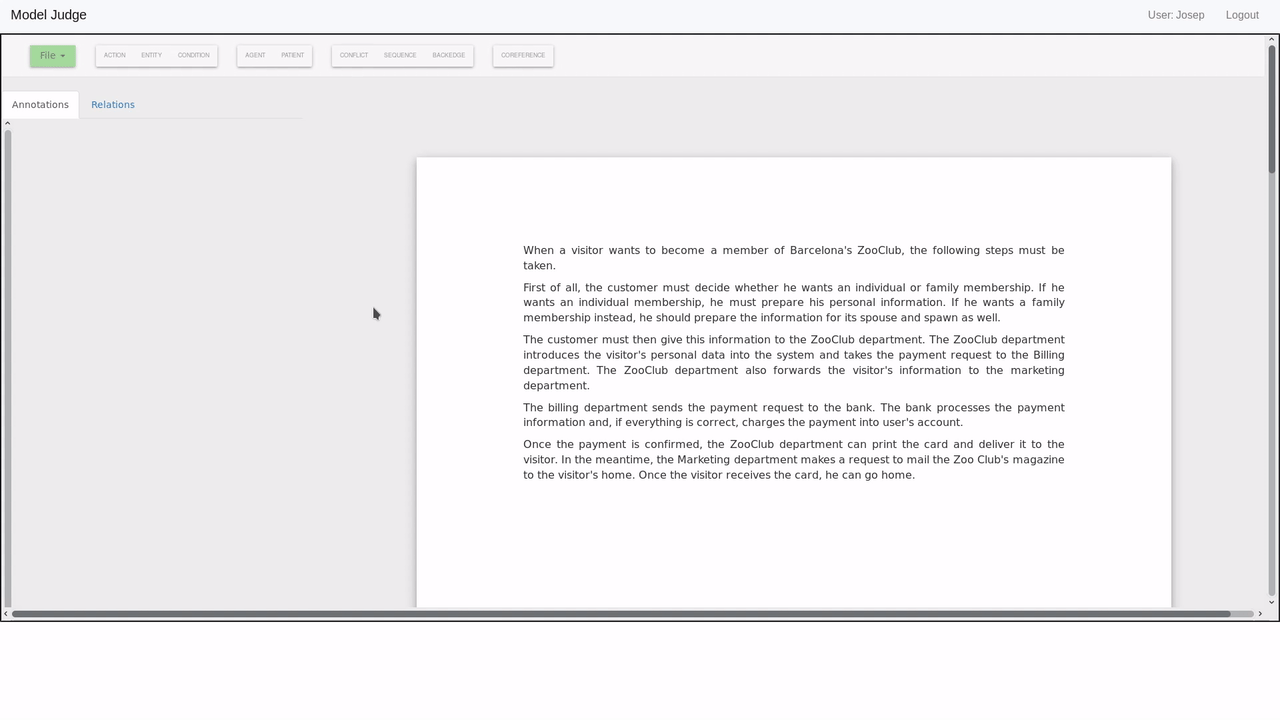
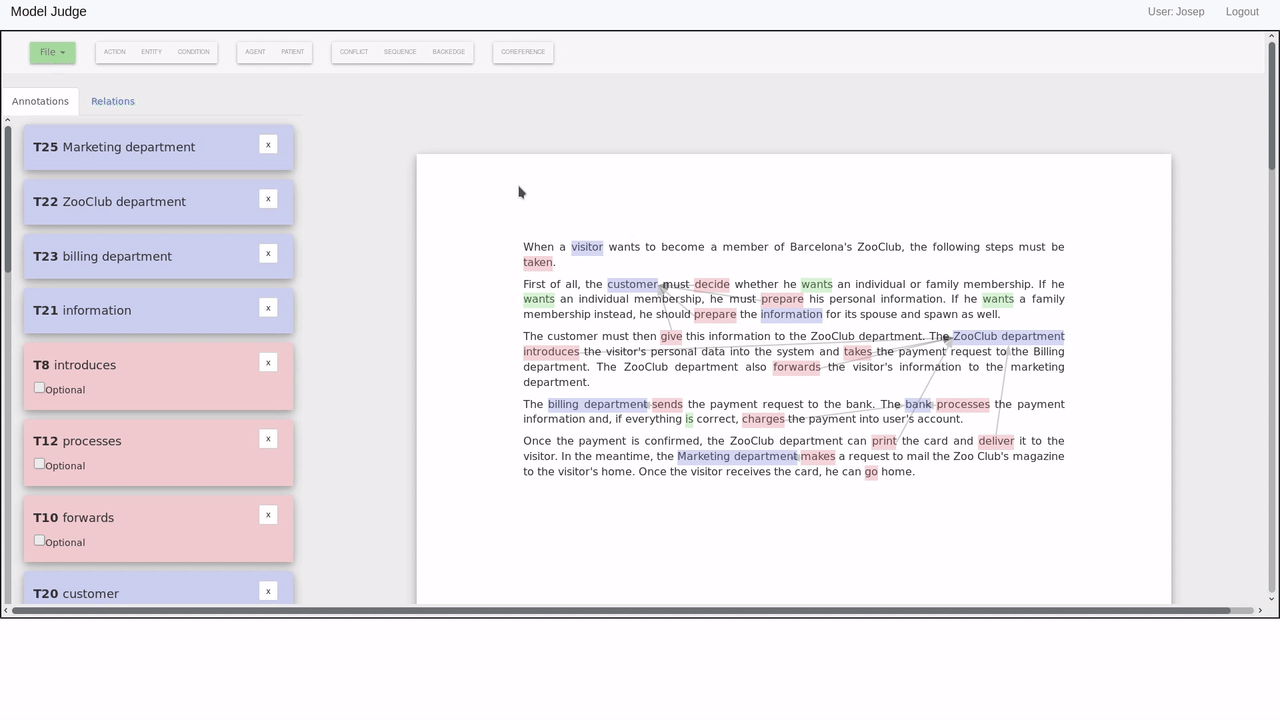
With the initial annotation complete, we can now highlight the main features of the ModelJudge exercise editor.
The right part of the page shows the annotated text, with color-coded annotations being displayed on top. Let's review the meaning of each annotation type:
- Activities are highlighted in red. Note that one should only highlight the activities relevant to the process model. This is especially important for the ModelJudge, as it will interpret any activity annotations as something that is expected for the students to model.
- Objects and Actors (i.e. Entities) are highlighted in blue.
- Conditions, Events, and other aspects relevant to the control flow of a process that cannot be classified as activities are highlighted in green.
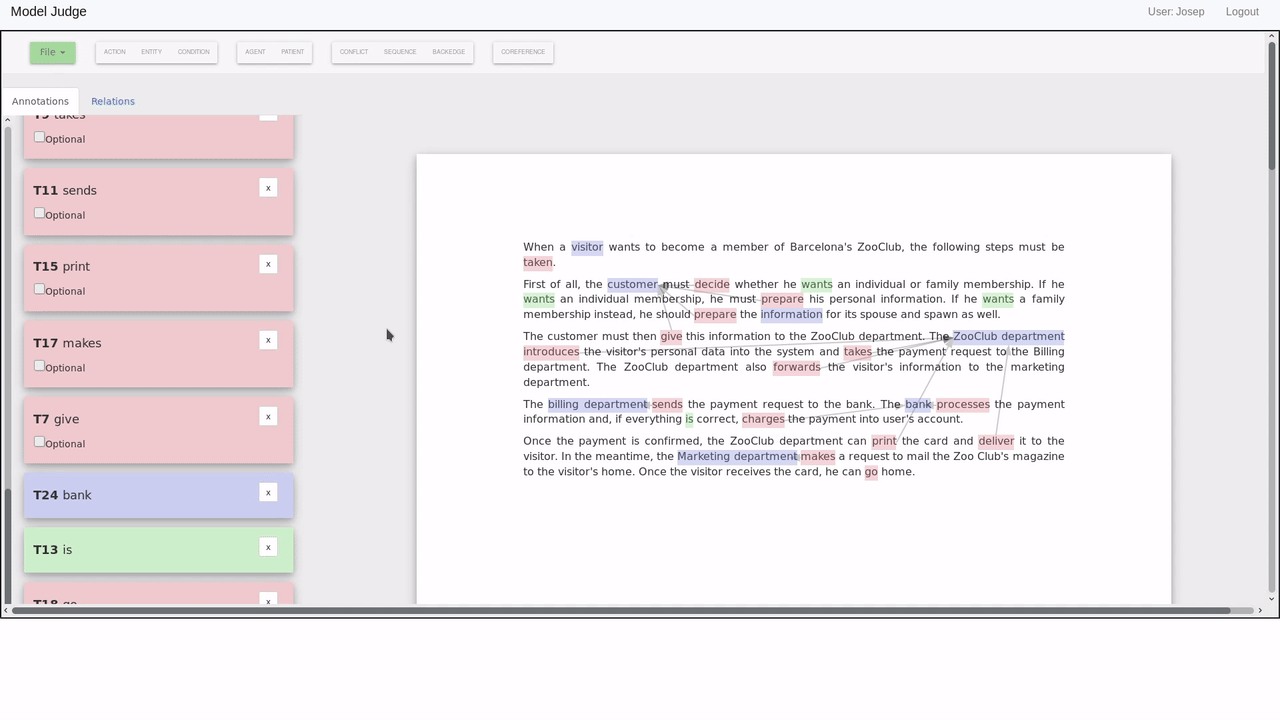
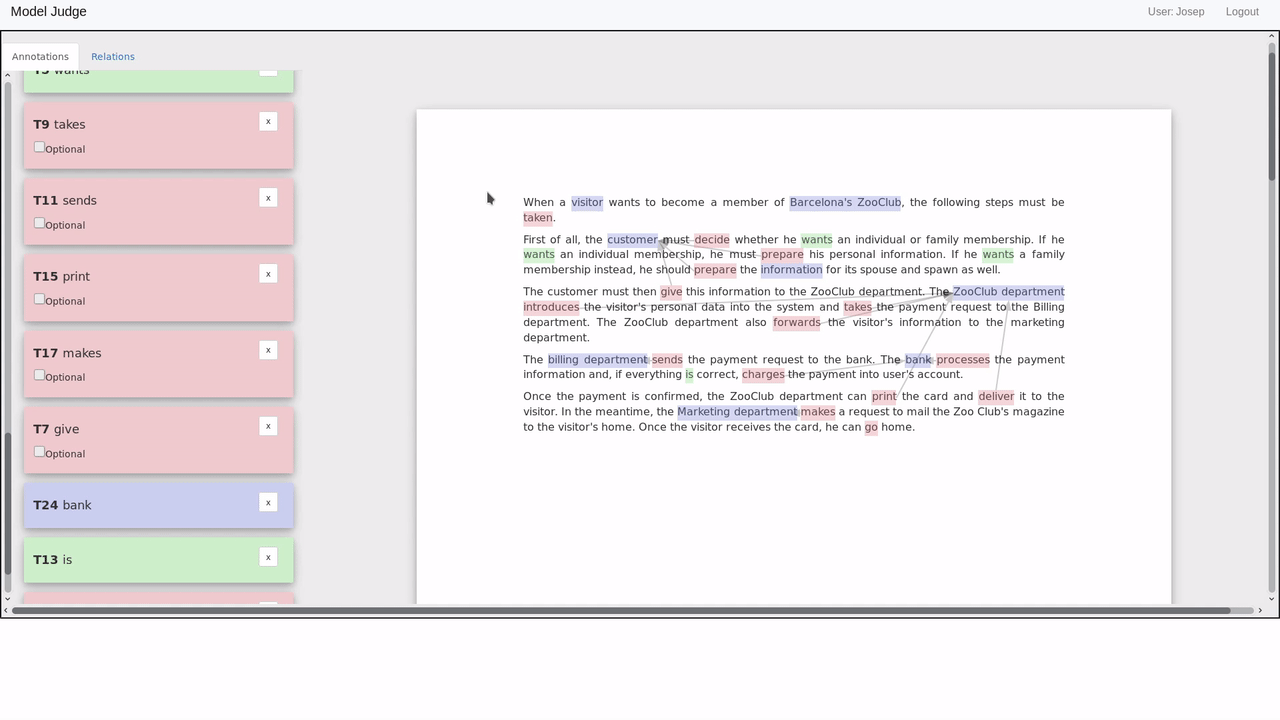
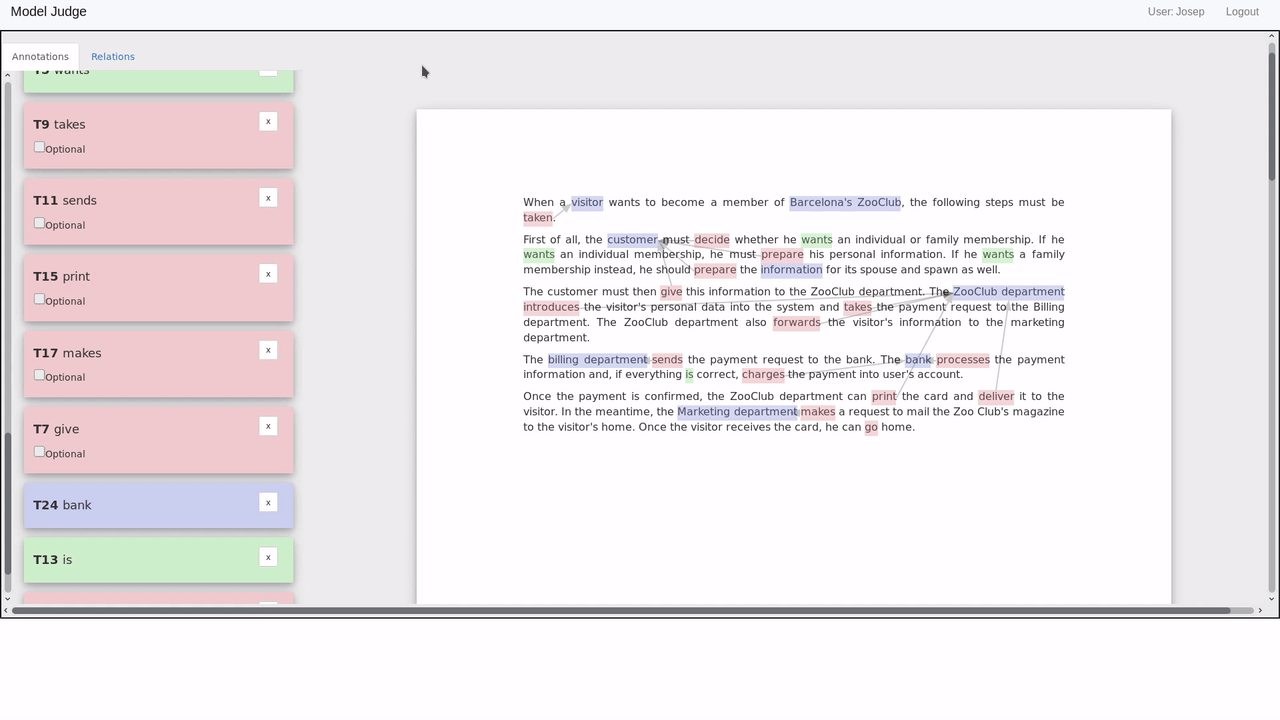
On the left panel, you can see a detailed view for each of the annotations. To quickly find an annotation on the list, you can click it on the text and it will scroll into view.
As we can see, after clicking on the "go" activity, it is highlighted on the left panel. There, we can also mark this activity as "Optional". In doing so, we tell the ModelJudge that students may or may not model this activity and both versions should be counted as correct.
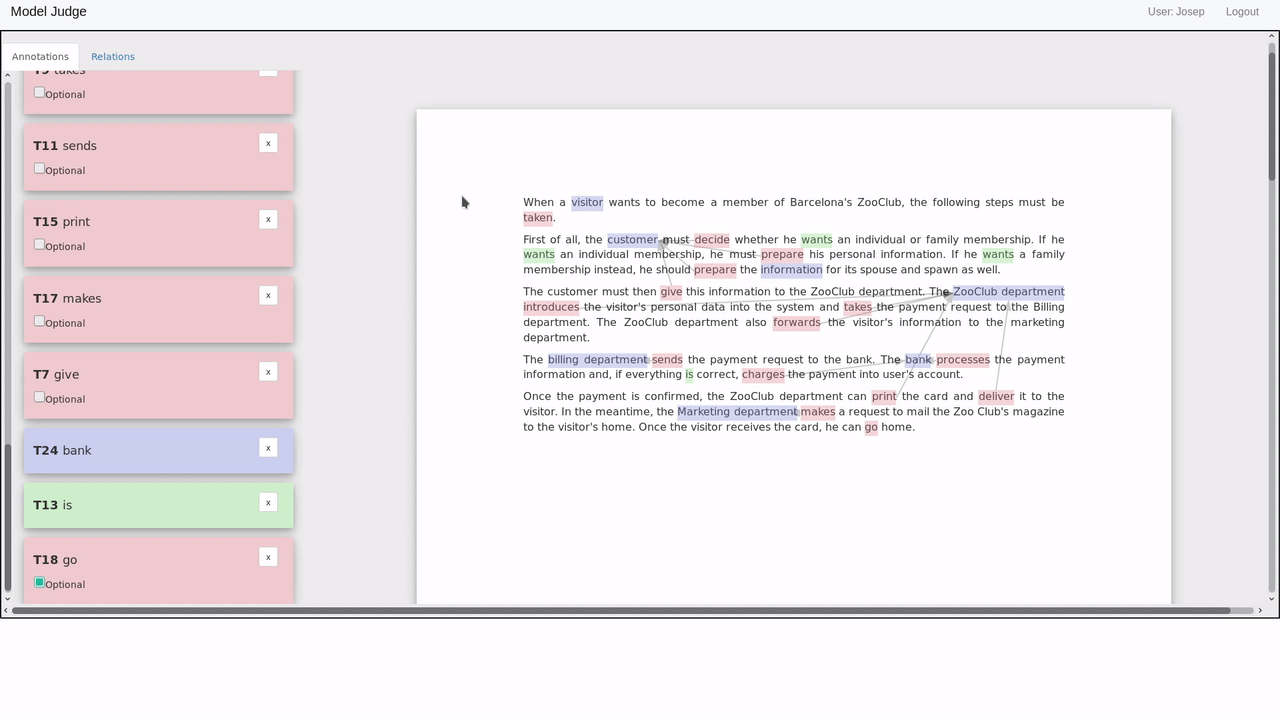
Another important concept are the arrows that link different annotation fragments. These represent relations between pieces of information. There are currently six kinds of relations. The first three are independent of the process flow:
- An Agent relation goes form an activity to the entity performing this activity. This information will be used by the ModelJudge to identify the main actors of the process (which must correspond to swimlanes in the BPMN).
- When annotating agents, if very different words are used to describe the same entity (such as with "Visitor" and "Customer"). The ModelJudge will not be able to infer those are not two separate entities. We can help it by linking those two elements with a Coreference relation.
- Another important aspect of an activity is the business object, or borrowing from the NLP community: The Patient of the action. By marking a patient relation between an activity and an entity, we tell the ModelJudge that students are expected to refer to this object in the activity label.
Then, there are three more temporal relation types. These are the most important types, because they represent the temporal information that students will need to encode in their process.
It is not required to fully annotate each pair of activities with a relation type. An inference engine underneath will make sure to apply obvious rules such as transitivity or symmetry of relations.
The types of temporal relations you can annotate, are the following:
- A Sequence relation is used to indicate that two activities are ordered in a certain way. Note that this does not imply that they should be in direct sequence. Namely: If A is in Sequence with B, then A must happen at some point before B in the process model.
- A Conflict relation is used to indicate two activites are in conflict. That is, they cannot occur both in the same execution of a process.
- A Back Edge relation is used to indicate the special type of relation that is created by loops. The final activity of a loop should link with a Back Edge relation to the start of the loop. This avoids the confusion that would otherwise generate to have two contradictory Sequence annotations.
Please note that currently the automatic annotation does not support the automatic detection of temporal relations, so they must be manually annotated by the instructor.
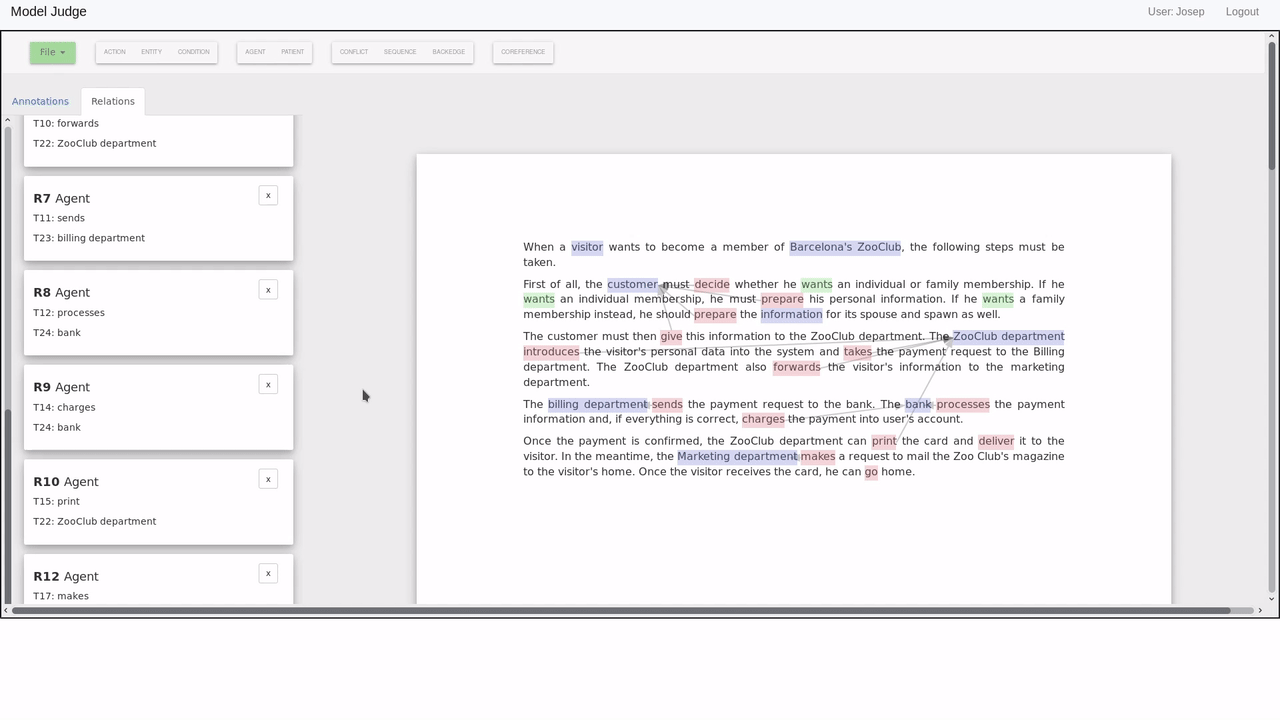
In order to see the kind of relation modelled by each arc, you need to check the left properties panel. By switching to the "Relations" tab, you can see detailed information for each of the arcs. For example, we can check that the arc that was generated between charges and bank is an Agent relation:
With all this knowledge, you are now ready to start annotating your own process!
6 Adding new Annotation Fragments and Relations
To add a new annotation Fragment, you need to select the relevant piece of text with your mouse. After releasing the click, a menu will pop up to indicate which kind of annotation you want to create. Let's for example declare that the "Barcelona's ZooClub" text fragment at the top of the document is a relevant entity of the process:
To add a new relation, drag an annotation fragment into another. This will show a similar menu where you can choose the type of the arc to be created. Let's declare that taken is done by the visitor.
Depending on the types of fragments, you will see different kinds of arcs in the menu. For example, we can now try to declare a Coreference between two entities:
As you can see, the editor will not let us create an incorrect relation type, so in this case only the "Coreference" relation is displayed on the menu:
7 Removing Annotation Fragments and Relations
There are two ways to remove an annotation and a fragment relation. You can either right click them on the text view, or press the "X" button on the left properties panel.

Removing an activity fragment will also delete all its incoming and outgoing associations, keeping the annotation consistent at all times.
8 Saving, Uploading and Downloading
We have now done some work in our process, but this is only our temporal copy. In order to save the exercise, we must click File > Save. You will be shown a message when the model is successfully saved.
After a successful save, the process description is automatically reloaded in the ModelJudge and all subsequent validations will be using the newly introduced information.
Two other functionalities under the File menu are Upload and Download. These two features allow you to obtain the current working copy as an annotation file. This file is in the same file format as other similar annotation tools, is easy to parse, and may be used locally for your own projects!
9 An Iterative Design Methodology
The features described in the previous section, allow for a very comfortable approach to the design of new exercises:
- You can keep two tabs open, one with the student view and the other with the exercise editor
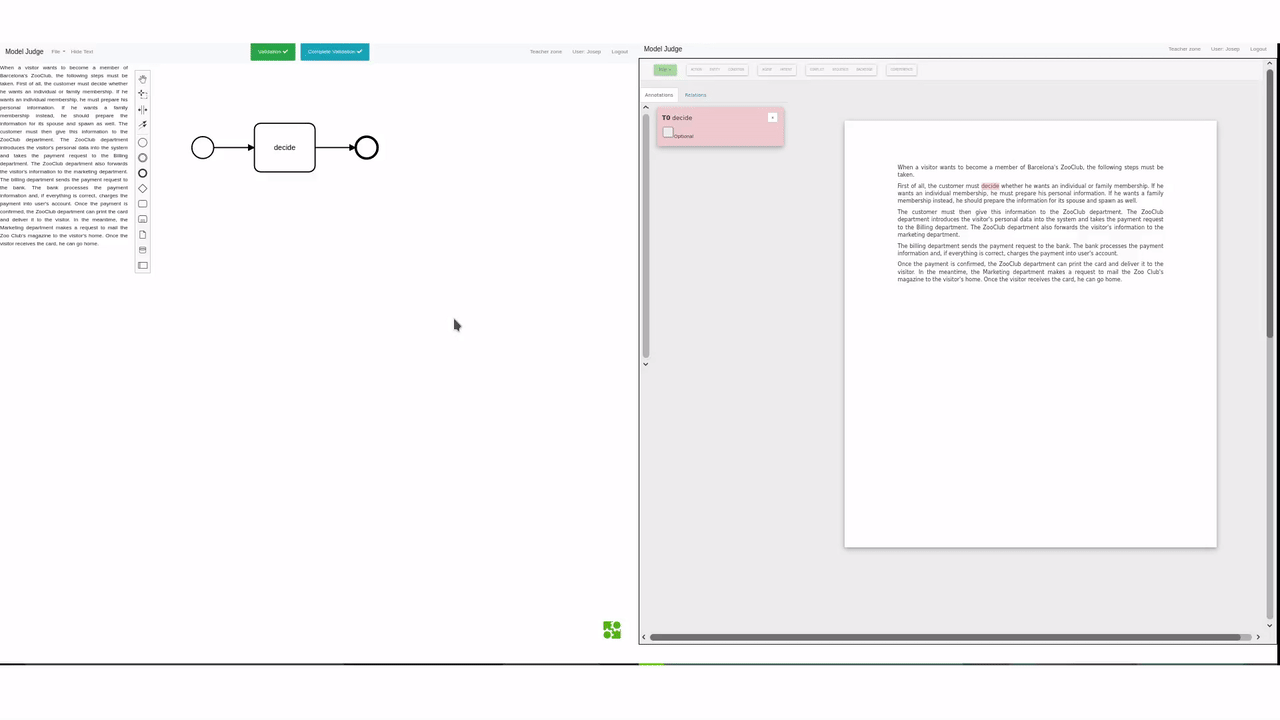
- After saving the model on the exercise editor hit the "Validate" button back in the student view
- You can see how the validations change in real time by incorporating the newly annotated information.
10 Filtering
After annotating a large text, you may notice the text view becomes a bit cluttered. The ModelJudge exercise editor has Filters to help with that. By pressing the filter buttons at the top of the page, you can enable or disable display for certain types of Fragment or Relation types.

For example, when you are focusing on annotating the temporal aspects of the process, it may be useful to diable display of Entity fragments.
11 Recap
In this tutorial, we have seen how to create an exercise using the new built-in editor. With this, you can create your own ModelJudge exercises. Let's review the recommended approach to create a new exercise in the platform:
- Create a new exercise by uploading a text file.
- Create a new course, with the associated exercise.
- Open the exercise editor view for the exercise.
- Use the "Automatic Annotation" functionality to allow ModelJudge to recommend you an initial annotation.
- Remove all unnecessary information from the initial annotation, and add anything that the ModelJudge may have missed.
- Annotate the temporal relations, which currently are not auto-annotated.
- Save the exercise.